
SCAD x Harbor Picture | Collaboration Project | SANM 560 - Week 05
- Rui Cui

- Feb 11, 2023
- 3 min read
In the previous week, we had some crisis understanding issues between the image that we had in mind and what the audience could feel from our previsualization.
So this week, we have discussed what we should do for our next step. The priority things we consider are to recreate the environment and the lighting situation.
Cause based on our old storyboard, the first four shots would not need to see the background. It will only transition in shot five and creates a kind of sunrise feeling for the audience. But when we switch to the new storyboard, we need to think more about the lighting and environment.
The first thing we did was completely recreate our scene's lighting, including the sky box. We have recreated the new sky based on the reference.


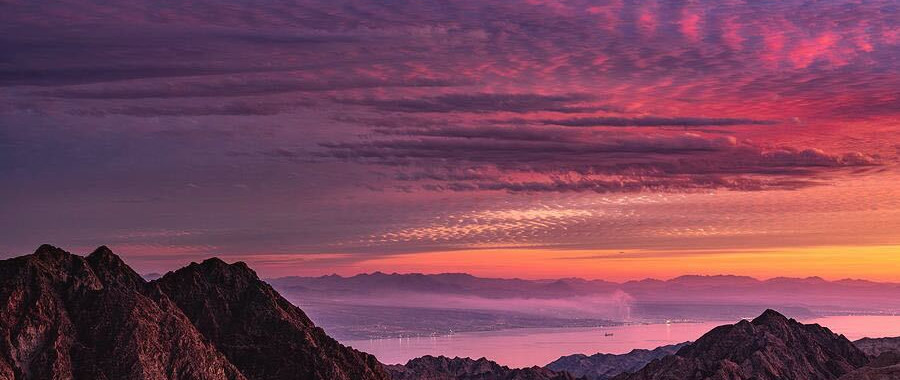

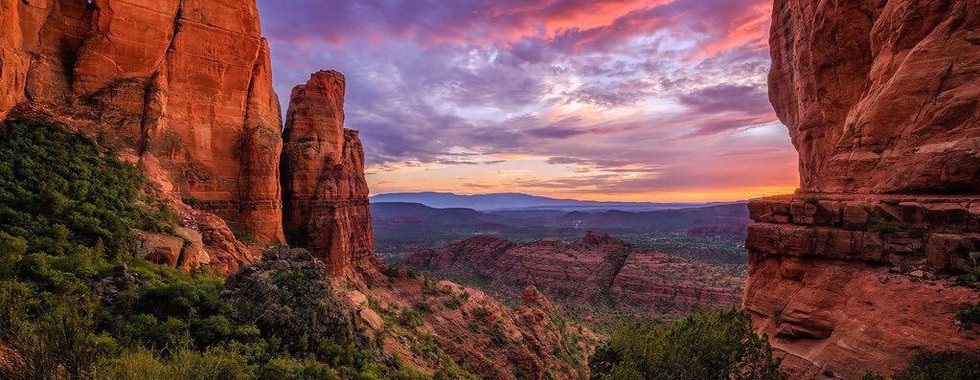
Above are our reference
Here is the sky we have right now. We use color palettes based on the reference we got. It looks more dramatic than it used to be.

The Environment with the new sky lighting
The second thing that we did was to recreate the whole environment. This one is quite harder than the lighting part. As we can see, the whole environment of the scene right now is quite small.

Top view
It is not bad, but really not enough if we want to make it a main part of our scene, and we also want to get the depth of the mountain as well. In that case, it is necessary to make the whole map larger and add more details. So we decided to work on the environment build this week mainly. And here is the first attempt we have at the environment

Top View for first environment Test
It looks good at the top view, but once we look at the side view, we soon realize that there is a huge difference between the background mountain texture and the foreground mountain texture. And the scale difference between the foreground and background looks not quite accurate compared to the real-world scale.

Side View for the new environment test
I have tried to use the cube to measure the distance between the cologne bottle and the mountains and separate the mountain into three rings. The first ring of the mountain is closest to the bottle, which is about 300 units. The second ring of the mountain is around 3000 Units to the bottle, and the third ring of the mountain is around 7000 Units.

Use Cube to measure the distance between foreground and background mountains.
Based on the measurement, I have set up the mountain in the far background, which looks like this:

It looks good and nice at this camera angle. But when we go back to the sequencer and look through the camera angle of shot 5, the mountain seems too high then.

Which completely blocks the sky view and the light from the sky, anmaking the whole scene lookd makes the whole scene looks too dark.
So, to make the superhero shot more like what we wanted it to be, we chose to lower the mountain's height and change the camera angle of shot 5. The height of the mountain is now 2/3 of what it used to be.

How the Superhero Shot looks like
I also change the camera type to 16:9 DSLR to give it a more vast feeling. And also decrease the saturation in the post-processing volume. And here is the final result that we have:

Comments